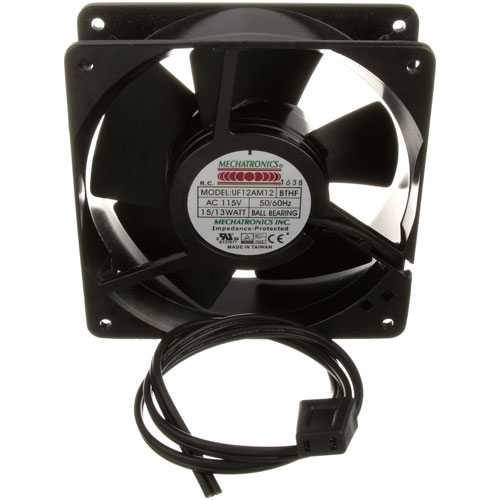
Hatco R02.12.001.00 Food Warmer Axial Fan W/ Lead Wire & Plug 115V
Specifications:
| Attribute | Details |
|---|---|
| Axial Fan With Lead Wire W/Plug | |
| 115V, 50/60Hz, 15/13W 4 Holes Threaded | |
| Ccw Blowing Away From Hub W/Label, Blower Fan, | |
| 4-1/8" Mount Ctrs X 1-1/2 Wide , | |
| For Lead Wire W/Plug Only Use # 38-1356 | |
| Hatco Food Warmer Fdw1 (X) |
Description
More Information:
- HATCO:02-12-001 ,02-12-001-00 ,02.01.201 ,02.12.001 ,02.12.001.00 ,0212001 ,R02-12-001 ,R02-12-001-00 ,R02.12.001 ,R02.12.001.00
Step1: Unplug the food warmer and ensure the unit is cool before starting.
Step2: Remove the existing fan from the warmer housing using a screwdriver.
Step3: Position the new Hatco fan in place, aligning the mounting holes.
Step4: Secure the fan with screws and connect the lead wire to the plug.
Step5: Double-check all connections, then plug in and test the unit.
Step6: Avoid contact with hot surfaces and electrical components during installation.
Customer Reviews
No reviews yet. Be the first to write one!
Write a Review
-
What maintenance is required for the Hatco R02.12.001.00 Axial Fan?
Regularly inspect the fan blades and motor for dust buildup and debris. Clean using a soft brush or compressed air to maintain airflow and prevent overheating. Check electrical connections for damage, ensuring the lead wire and plug are secure to avoid potential hazards.
-
What are common issues with the Hatco R02.12.001.00 Axial Fan?
- Fan failing to start or exhibiting intermittent operation
- Excessive noise or vibration from worn bearings
- Overheating due to airflow obstruction
- Damaged or frayed wiring affecting power delivery.