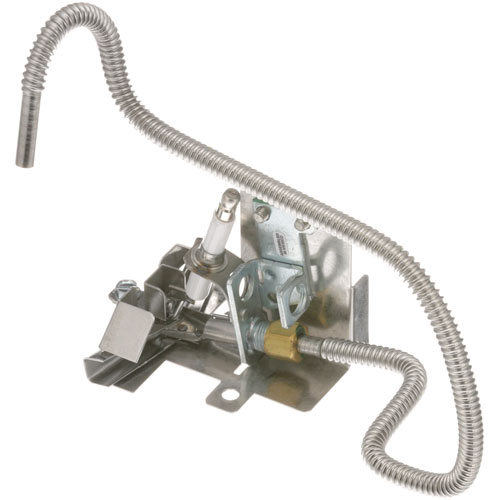
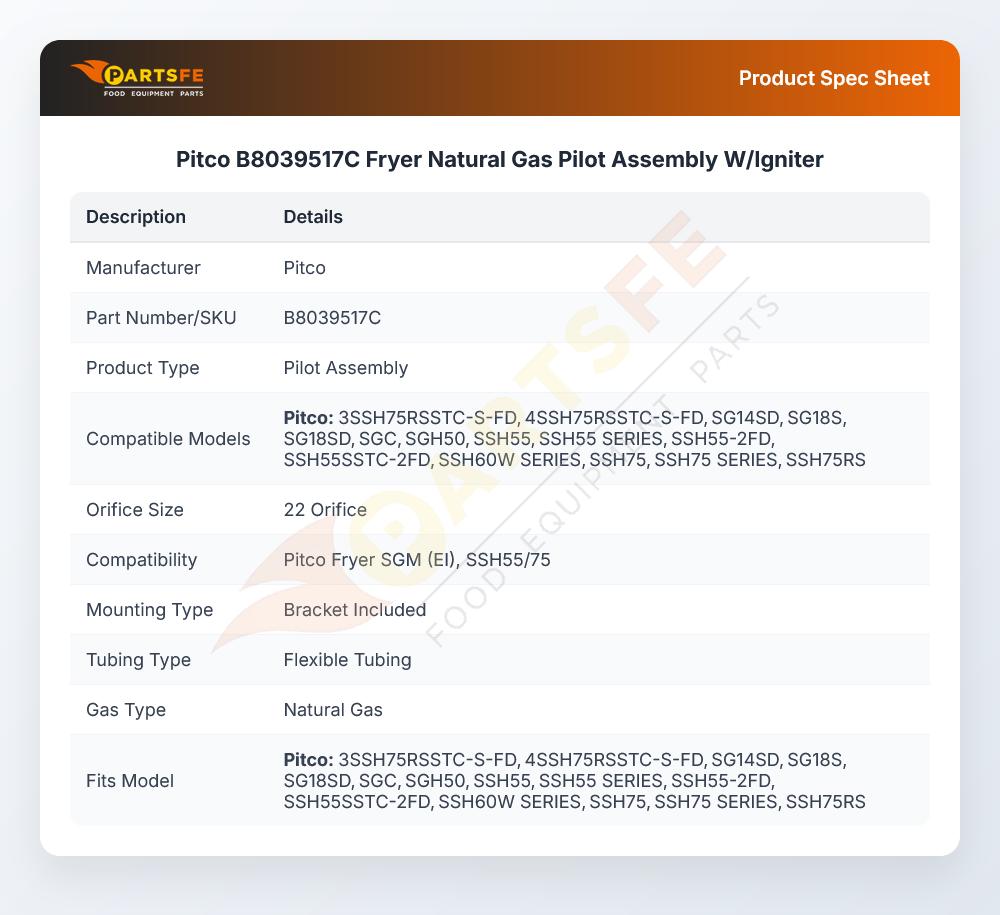
Pitco B8039517C Fryer Natural Gas Pilot Assembly W/Igniter
Specifications:
| Attribute | Details |
|---|---|
| Nat Pilot Assembly W/Igniter, Bracket And Flexible | |
| Tubing,#22 Orifice | |
| Pitco | |
| Fryer Sgm (Ei), Ssh55/75 |
Description
More Information:
- MAGIKITCH'N:B8039517-C||PITCO:B8039517-C ,B8039517C ,PTB8039517-C ,PTB8039517C
Step1: Shut off gas and power, allow fryer to cool fully to avoid fire or burn risk.
Step2: Remove old pilot assembly and disconnect gas and ignition wiring carefully.
Step3: Install new assembly, secure mounting bracket, and reconnect gas line tightly.
Step4: Reconnect igniter wiring, check for leaks with soapy water, then test ignition.
Step5: Wear heat-resistant gloves and ensure proper ventilation during testing.
Step6: Restore gas supply only after confirming no leaks.
Customer Reviews
No reviews yet. Be the first to write one!
Write a Review
-
What maintenance is required for the Pitco B8039517C Pilot Assembly?
Clean the fryer pilot assembly and igniter tip regularly to prevent carbon buildup and blockage. Inspect gas connections for leaks and secure fittings. Ensure proper electrode alignment for consistent ignition and safe fryer operation. Replace worn components promptly.
-
What are common issues with the Pitco B8039517C Pilot Assembly?
- Weak or no pilot flame.
- Fryer igniter failure or no spark.
- Clogged pilot orifice reduces gas flow.
- Intermittent ignition or delayed startup.
- Carbon buildup on the electrode.
- Loose wiring or poor connection.