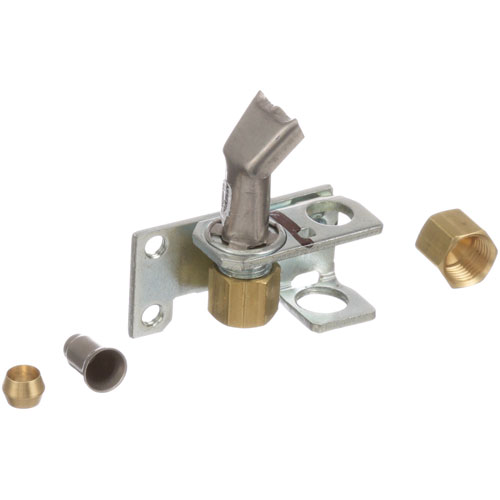
Garland GL11769-2 (GARLAND) Oven Pilot NAT/LP
$32.84
Price reduced from
$58.65
Specifications:
| Attribute | Details |
|---|---|
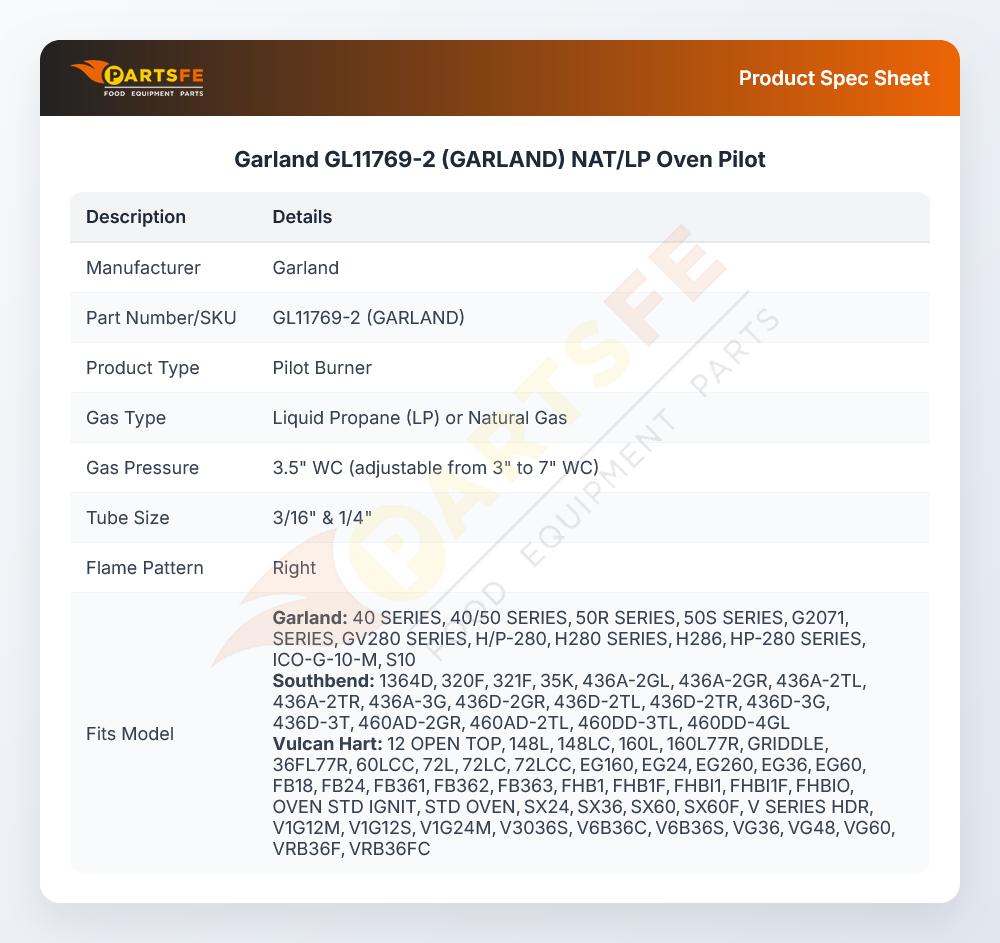
| Nat/Lp Pilot, Factory # 2Ch-10, 1830-115, 1830-500, | |
| Tube Size 3/16" & 1/4", Flame Pattern Right | |
| Garland Oven Series | Bco, Eco, G48P, G2000, Ico. |
| Southbend Oven 321D After 1982 (1982 & Prior Use Oem # | |
| 1164282).Series | 136 & 142 W/Suffix C Or D But W/O Co |
| Prefix, 300 W/F Suffix. | |
| Us Range Oven Series | Performer Ii (Right Side) W/Standing |
| Pilot.(Units W/Electronic Pilot Use M-214) | |
| Vulcan Hart Oven 260L-77R, 319A-77R, 399A-77R, Series | Eg, |
| Vg.Sg-60L-77R, Sg-260L-77R.24L, 48L, 481L/Lc, 148L/Lc, | |
| 36L/Lc, 60L/Lc/Lcc 160L/Lc, 260L/Lc/Lcc | |
| Wolf Model? |
Description
The Garland GL11769-2 (GARLAND) Oven Pilot NAT/LP works on the concept of the formation of a continuous pilot flame, which is used to start the burner when the equipment is operated. It controls the amount of gas to feed the flame, to be used in natural gas or liquid propane. It is constructed in a manner that it can direct the flames to the burner ports, respectively. The component is attached to gas supply fittings and ignition parts so that programmed start-up and shut-down operations can be carried out.
More Information:
- FRYMASTER:810-2403 ,8102403||GARLAND:1028200 ,1028297 ,1028298 ,1028299 ,1091898 ,1091899 ,11769-2 ,11769-2 (GARLAND) ,227198 ,227198-1 ,GL1028299 ,GL11769-2 ,GL11769-2 (GARLAND)||HOBART:00-412787-00001 ,00-412787-00002 ,112787-1 ,112787-2 ,412787-00001 ,412787-00002 ,412787-1 ,412787-2||SOUTHBEND:1163869 ,1163870 ,SOU1163869 ,SOU1163870||U-LINE:1830-115 ,1830-11E||VULCAN HART:00-412787-00001 ,00-412787-00002 ,112787-1 ,112787-2 ,412787-00001 ,412787-00002 ,412787-1 ,412787-2 ,VH109839-6 ,VH112787-1 ,VH112787-2 ,VH409839-6 ,VH412787-1 ,VH412787-2
Step1: Shut off gas supply and ensure the oven is completely cool before starting.
Step2: Remove the access panel to reach the existing oven pilot assembly.
Step3: Disconnect the pilot gas line and mounting hardware carefully.
Step4: Remove the old oven pilot from its mounting position.
Step5: Install the new oven pilot and reconnect the gas line securely.
Step6: Restore gas supply and test the pilot flame for proper ignition and stability.
Customer Reviews
No reviews yet. Be the first to write one!
Write a Review
Thank you! Your review has been submitted.